
When it comes to aesthetic dentistry, many clinicians would agree that the “Single Central” cases are the ones that can be the most difficult. Trying to restore a single central brings up many discussion points:
- Direct or Indirect?
- Full coverage or Partial?
- What materials should we use?
Often, we reach out for the help of our lab technician where aesthetics is controlled in a benchtop manner. Ceramics and porcelains have made huge strides over the years, providing clinicians with access to better esthetic outcomes. As well, digital photography has given us the ability to communicate our goals to the lab technician, which usually provides a result the patient, clinician and technician are happy with.
However, creating that result with ceramic requires a highly skilled lab technician and the possibility for corrections or remakes. Although we can be extremely conservative in most situations, ceramics usually require some level of tooth preparation as well. Direct materials such as composite resin give the clinician full control over the situation. Composite resin has the ability to mimic the appearance of both enamel and dentin, can be easily repaired and can be completed in a single visit. Composites are often much easier for the clinician to match the shade with the ability to directly mock-up cases before proceeding. Virtually all clinicians have access to composite and the many shades available on the market. Composite is also easily accepted by patients as it is often the least invasive way to complete treatment and has proven to be a long-lasting solution. Composite can also serve as a test-drive in cases where the clinician and patient are determining what the end result should be.
Everything in dentistry is “temporary” and the less tooth structure we remove, the better long-term outcome for the patient. We always have the possibility to remove previous work and progress down the restorative continuum, and by starting with a minimally invasive approach we retain the ability to use different methods later on. If we start off placing a full coverage crown and it fails due to recurrent decay or fracture, our options for future treatment are extremely limited.
Case Report
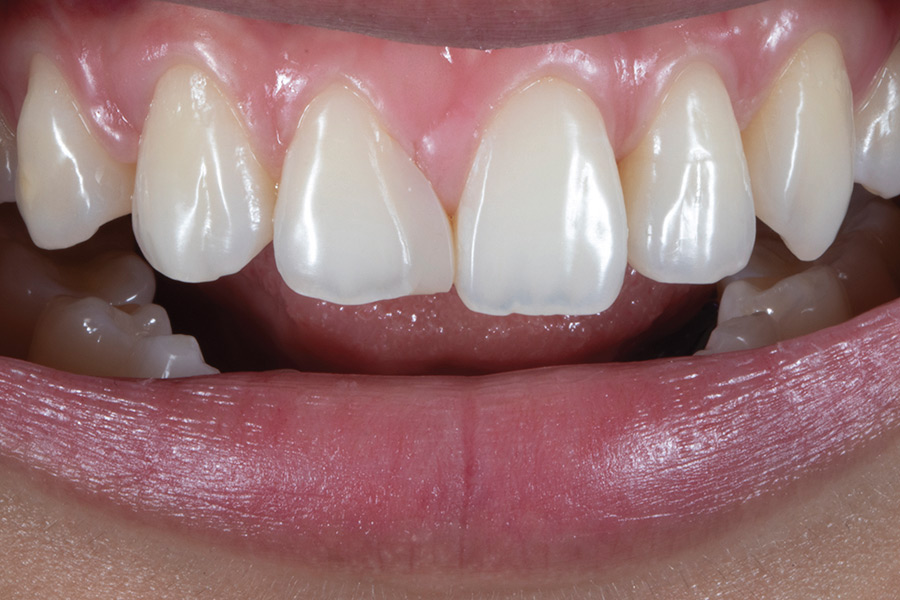
A 20-year-old patient (Fig. 1) was referred to our office with a chief concern that her two front teeth did not match. She had dealt with this her whole teenage and brief adult life and wanted to explore options to correct this issue.
Fig. 1

Dental History
This patient had comprehensive orthodontic work following the extraction of the central incisor (1.1) as it was impacted. Unfortunately, the patient’s orthodontist had retired by the time we had seen the patient and we unable to gain complete records regarding the diagnosis. Regardless, the problem presented as is. We were able to obtain some pre-treatment photographs and records showing severe crowding as well (Fig. 2). The decision was made to extract teeth 2.4 and 3.4 as well. The lateral incisor 1.2 was moved into the space of the central and the patient had the space closed directly with composite approximately nine years ago.
Fig. 2

The current restoration shows a smooth emergence from the gingival tissue and tight contact with the neighbouring central. However, the restoration lacks the aesthetic appearance the patient is seeking.
Other factors to consider are the facial and dental midline discrepancy, tooth size/space available discrepancy, and high aesthetic demands. There is an excess of tissue between 1.2 and 2.1, yet the bone crest is flat in the area as demonstrated by the preoperative periapical radiograph (Fig. 3). This appearance is peculiar, and the tissue almost appears as though it is scar tissue (Fig. 4).
Fig. 3

Fig. 4

Luckily, the patient does not exhibit a high smile line, so any “pink asymmetry” around the zenith of the teeth will not affect the outcome.
Before continuing with any anterior composite work, a digital mock-up should be created to assess the final outcome. In this case, a mock-up was used to assess the space available to see if we only need to address a single tooth, or are multiple restorations needed. Based on the mock-up, if we continued to only restore 1.2, we would end up with a larger tooth than 2.1, which will cause too much visual tension. Instead, we proposed an alternative plan, adding a very small amount of resin to the mesial of 2.1 to create equal proportions between the two teeth. The idea of moving the lateral more mesially through orthodontics was entertained to achieve a better emergence profile. Ultimately, we decided to make an attempt restoratively.
The Process
At the initial consultation we typically discuss whitening, however the patient currently is at B1 on the Vita shade guide and there was no perceived benefit in this case. The shade was roughly equivalent to B1 body and dentin custom shade tab using Filtek Supreme (3M) composite. We took photos as well as upper and lower alginate impressions to complete a wax up.
Polarized photographs (Fig. 5) were taken to assess the incisal effects and assist in shade matching. Custom shade tabs were fabricated (My Shade Guide, Smile Line) and using Adobe Photoshop we were able to manipulate the photo to compare the teeth and shade tabs.
Fig. 5
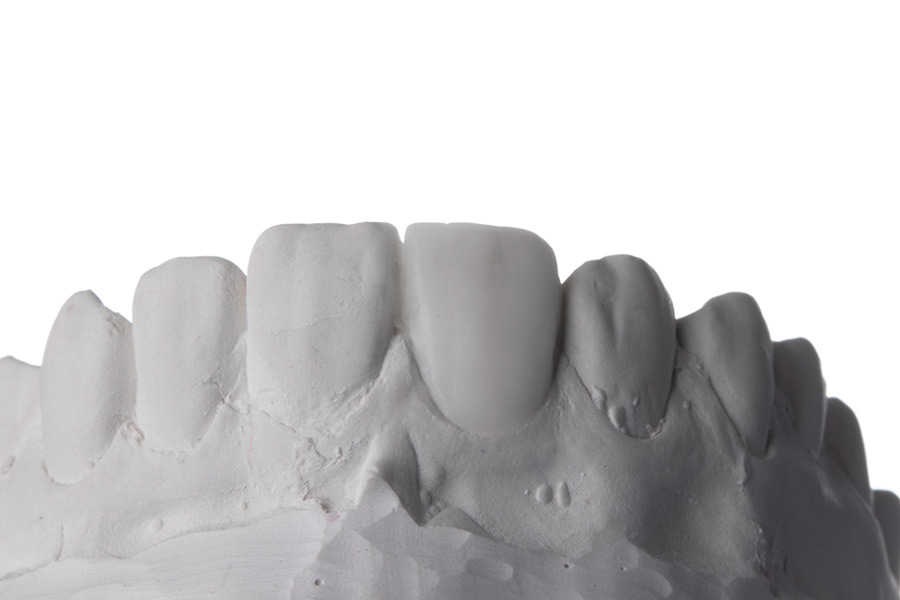
Given the complex anatomy of tooth 2.1, we need to place a layered composite resin restoration trying to mimic the dentin and enamel shades. Whenever placing a layered composite restoration, the use of transferring the palatal shell with a wax up (Fig. 6) provides more control for a predictable outcome.
Fig. 6

We created a putty matrix (Genie Putty Fast Set, Sultan) from the palatal surfaces and trimmed it for our use (Fig. 7).
Fig. 7
Intral oral button try in of composite (Fig. 8) was completed before starting, to verify the shade match and help visualize the layering technique we will use.
Fig. 8

The previous resin restoration was removed without rubber dam isolation (Fig. 9). Our goal was to assess the soft tissue contour without the restoration in place and decide whether or not to remove soft tissue from the papilla. Once the restoration was removed, we exposed a radiograph to verify the resin was completely removed. From the periapical we could see some small remnants of composite resin on the mesial surface, which we decided to remove once the tooth was isolated. The soft tissue profile presented favourably and we decided to attempt to restore without manipulating the gingiva for now.
Fig. 9

Composite placement falls under the category of adhesive dentistry, in which isolation and clean working field is paramount. Proper isolation using rubber dam techniques creates a stress-free working environment for clinicians, where we do not have to worry about moisture contamination or materials and water being sprayed intra-orally.
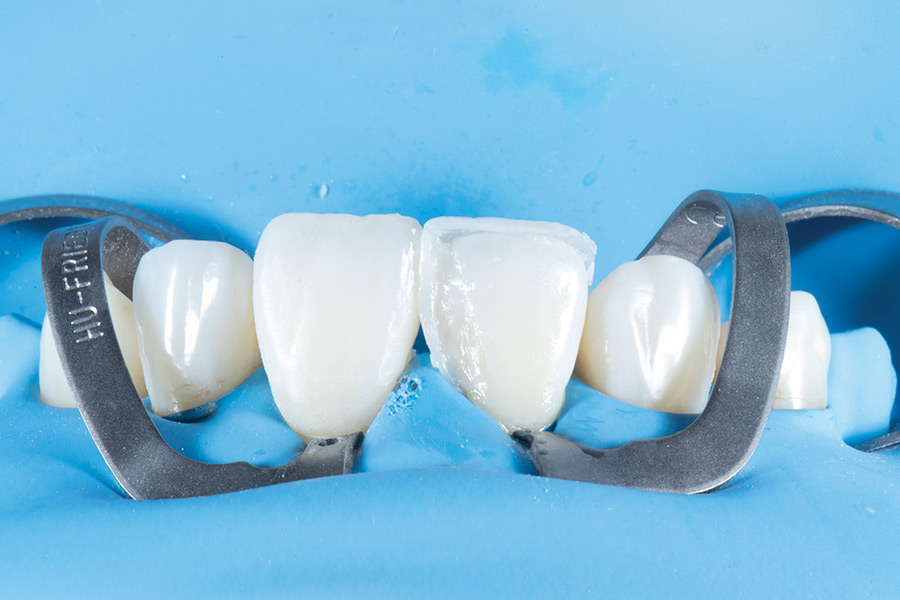
Using a heavy gauge rubber dam (6”X6” Heavy, Nic Tone) with extra retraction using modified clamps (Clamp 212, Hu Friedy), the papilla and gingiva are retracted in a way that provides excellent vision and access to the teeth (Fig. 10).
Fig. 10

The use of modified clamps is essential here as the putty matrix can only be placed if the clamps provide access to the palatal surface (Fig. 11).
Fig. 11

Once isolated, we can begin the adhesive process. Air abrasion is another essential tool for composite placement. Air abrasion achieves a number of things in an efficient manner, such as biofilm removal, removing any remaining restorative materials, and micro mechanical roughening of the enamel surface. Teflon tape is placed over the adjacent teeth to protect them and air abrasion was carried out with 27 μm aluminum oxide particles at 40 psi (PrepStart, Zest Dental Solutions).
Tooth 2.1 was then etched with 37% phosphoric acid (Super Etch, SDI Limited) for 20 seconds and is thoroughly rinsed and dried. Universal adhesive (All-Bond Universal, Bisco Dental) was used and applied following the manufacturer instructions.
First the 2.1 was restored (Fig. 12), first by placing a small increment in the palatal aspect using the putty matrix. Composite (Filtek Supreme B1B, 3M) was then placed freehand to restore the mesial surface and polished back to ideal contour and finish.
Fig. 12

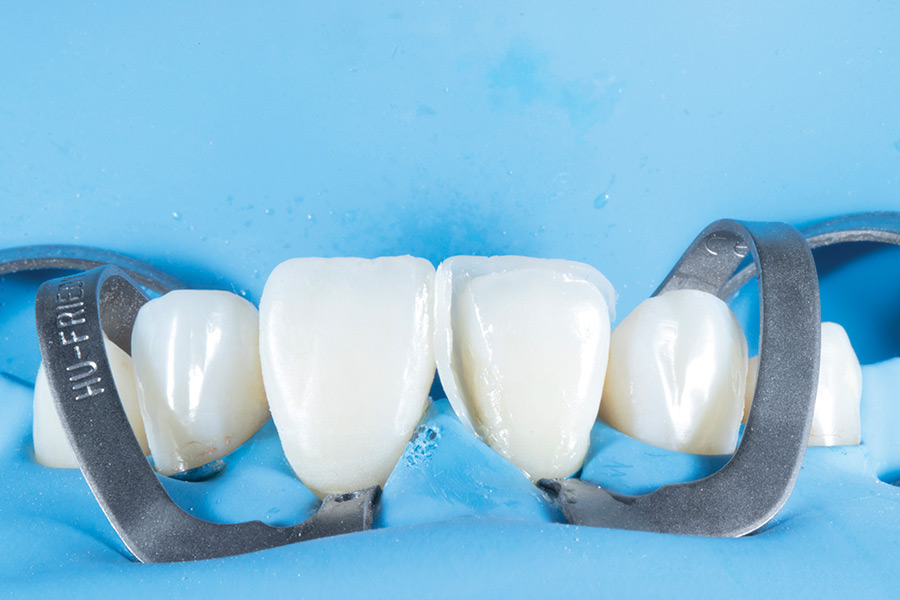
Tooth 1.2 was then prepared for bonding in the same manner as 2.1 (Fig. 13). First the palatal shell was created using an enamel shade (Filtek Supreme B1E). The proximal surface was restored (Fig. 14) using a vertically placed posterior matrix (Composi-Tight, Garrison Dental Solutions). Using the matrix in this fashion provides superior advantages over traditionally used acetate-matrices in that it creates a natural curvature, whilst also providing a nice seal in the gingival aspect (Fig. 15).
Fig. 13
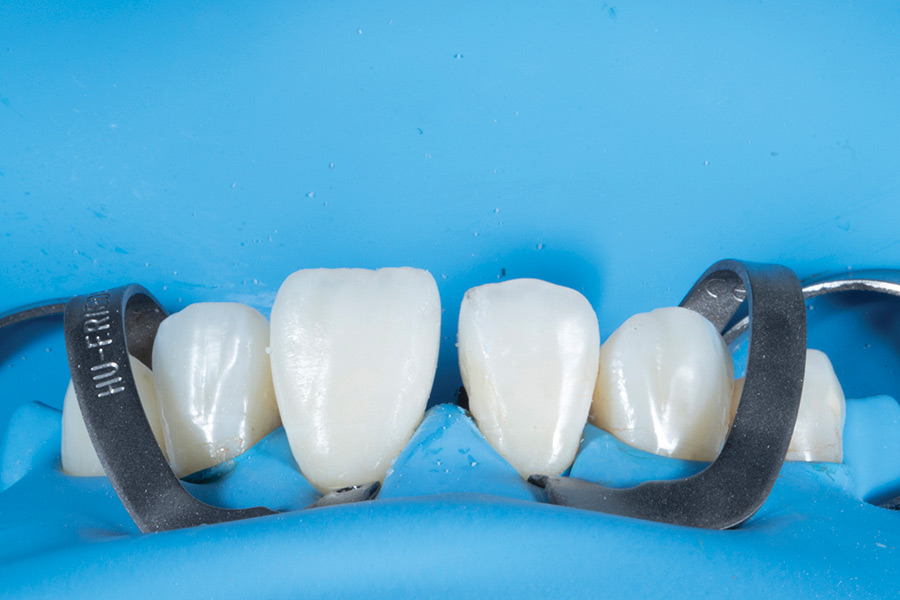
Fig. 14

Fig. 15

Dentin composite replacement was placed in the necessary areas to prevent the restoration from appearing too translucent (Fig. 16).
Fig. 16
The incisal edge was restored to create a “halo effect”, dentin masses were shaped to help create the appearance of the incisal translucency. The final facial layer (FIltek Supreme B1B, 3M) was sculpted to a reasonable stage to minimize the finishing protocol (Fig. 17).
Fig. 17
The polishing protocol was carried out using Soflex Discs (3M), polishing wheels (Footsies, Komet) and goat hair brush (Jiffy Goat Hair Brush, Ultradent) using polishing paste (Diamond Twist SCL, Premier) (Fig. 18).
Fig. 18

After removing the rubber dam, we verified the excursive movements and occlusion. The patient is instructed to come back in one week to make final adjustments and apply a final polish (Fig. 19).
Fig. 19

Always remember that after working in the anterior region with composite, rehydration must occur before we can make our final judgment on the outcome.
One-Week Control
Adjustments were made to clean up the line angles and again we polished the surface. In summary, the outcome is a big aesthetic improvement over the previous restoration. The patient’s ecstatic reaction was the most fulfilling outcome we can hope for as health care professionals. A detailed analysis shows that we placed the “halo” incisal edge layer too thick compared to the adjacent tooth (Fig. 20). It is of course possible to correct this by cutting back the incisal third and redoing the layers. However, the patient did not perceive this difference and did not want to undergo any further procedures as they were delighted with the result. Comments like these serve as a reminder for our team that we are ultimately treating a person, and it’s their opinion and final judgement that matter.
Fig. 20
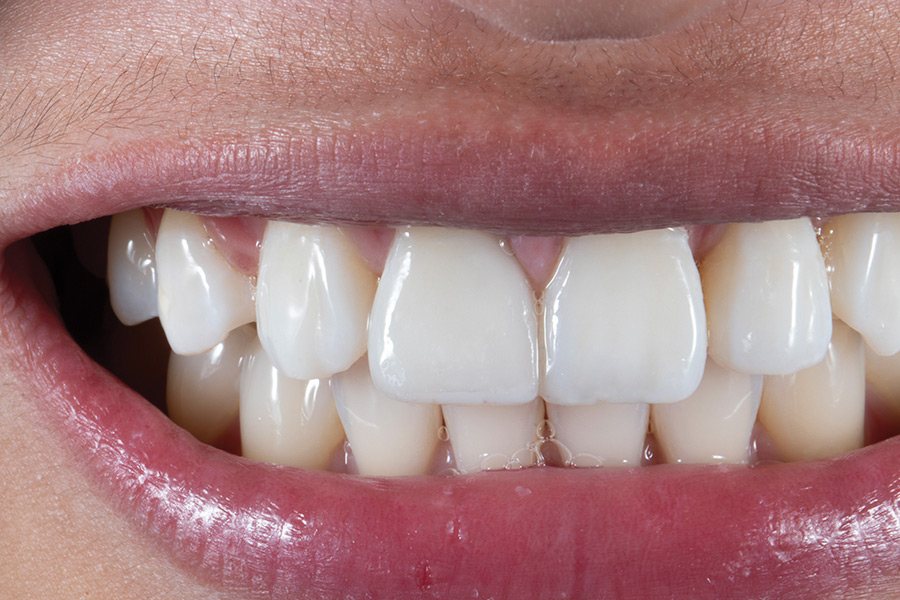
Fig. 21
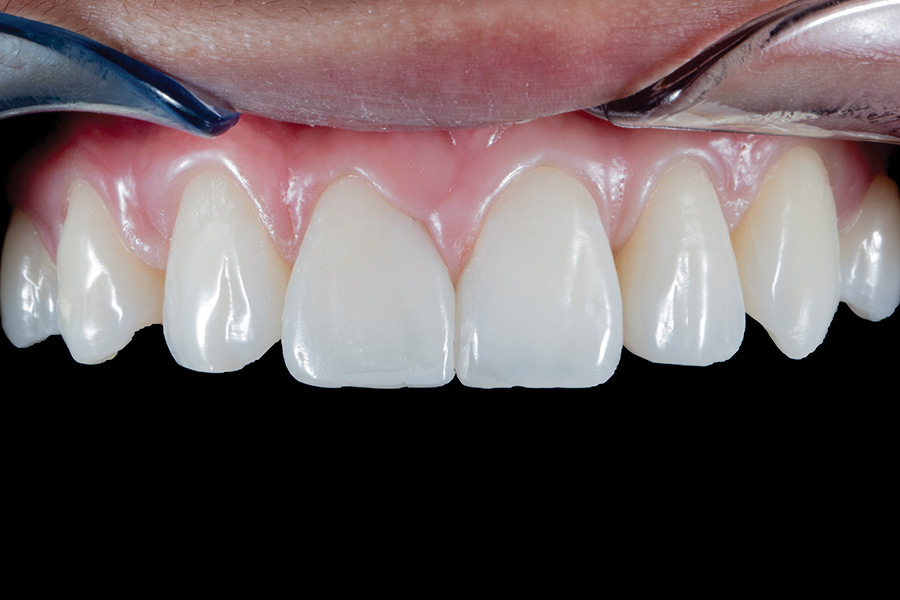
Fig. 22

Fig. 23

Fig. 24
Conclusion
Composite is the most versatile material we have in our armamentarium as clinicians. While you can argue whether or not “no-prep” procedures are “reversible”, the preservation of tooth structure is vital in preventing post-operative complications and keeping options open in the future. I applaud the previous clinician’s choice for treating this case conservatively, which gave us an opportunity to use a minimally invasive approach again. Had this tooth been cut down for a crown, it would be difficult to recreate the same outcome. In this age of modern materials and techniques, it’s becoming easier to practice by, “prevention for extension”, as opposed to the traditional mentality, “extension for prevention”.
Oral Health welcomes this original article.
About the Author
 Dr. Sunny Virdi graduated from the University of Manitoba in 2016. He maintains a full-time ownership role in a group private practice in Winnipeg, Manitoba. Dr. Virdi has received postgraduate training in the latest techniques regarding isolation, adhesion, materials science and esthetic dentistry. He has received extensive training in the latest restorative techniques with world renowned leaders in restorative and esthetic dentistry. Dr. Virdi is a fan of collective learning and always keen to share his experience by participating in multiple study clubs. Dr. Virdi is a member of the Canadian Dental Association and the Manitoba Dental Association. Dr. Virdi can be reached by email at sunnyvirdi.dr@gmail.com or through Instagram @dmdsunny.
RELATED ARTICLE: Tissue Management: A Guide to Capture a Single Tooth Preparation up to a Full Arch


